Sunflower Pen (Version 2) — Free Crochet Pattern
Make a bright sunflower pen with a textured center, yellow petals, tiny leaves, and a smiley crochet pot. A desk-friendly amigurumi flower tutorial.
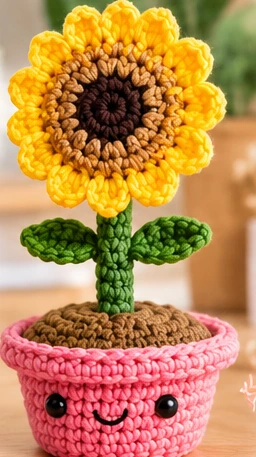
Project details & close-ups
Each pattern has its own set of useful visual references
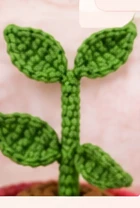
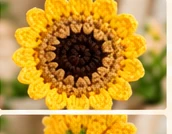
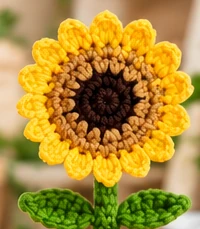
✳ Gather your supplies
- Yarn: Dark brown, light brown, sunny yellow, leaf green, and orange/coral yarn
- 3.75 mm (F) or 4 mm (G) crochet hook
- A standard pen roughly 8 mm wide (adjust sleeve size as needed)
- 10 mm safety eyes (optional) or black embroidery thread for a face
- Light polyester stuffing, tapestry needle, scissors, stitch marker
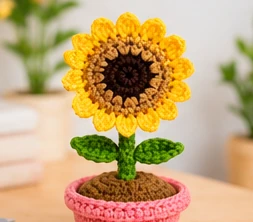
Some projects feel like instant sunshine. This cheerful sunflower sits above a crocheted pen sleeve and a tiny pot, turning ordinary stationery into a miniature desk garden. The puffed seed ring and layered yellow petals make the bloom especially tactile.
Your desk-garden project at a glance
- Difficulty: Advanced (source pattern rating).
- Approximate finished size: Approximately 12 × 25 cm; measurements depend on pen, yarn, tension, and flower shaping.
- Hook: 3.75 mm or 4 mm. Terms: US crochet terms; work in continuous rounds unless specified otherwise.
- Construction: individual flower head, two leaves, green pen sleeve, terracotta pot, and hollow-centered soil.
- Before stitching: choose a pen and confirm its barrel width. The base pattern is sized for a pen around 8 mm across.
Crochet shorthand (US terms)
| Abbreviation | Meaning |
|---|---|
| MR | Magic ring |
| sc | Single crochet |
| sl st / sl | Slip stitch |
| ch | Chain |
| hdc | Half double crochet |
| dc | Double crochet |
| tr / TC | Treble crochet |
| inc | Increase: work two sc in the same stitch, unless another stitch is specified |
| hdc inc | Two half double crochets in the same stitch |
| dec | Decrease: single crochet two stitches together |
| BLO | Back loops only |
| FLO | Front loops only |
| puff | Puff stitch (use your preferred puff-stitch technique; the source does not specify the number of loops) |
| […] × n | Repeat the bracketed sequence n times |
Stitch totals in the final column count the stitches after completing the round. If your number differs, check the increases or decreases before moving on.
Part 1 — Make the sunflower head
✿ Flower-head shaping
Visual orientation only; follow the round counts in the written instructions.
Make the front disk first, changing colors at the start of round 4 and again before the petals.
| Round | What to crochet | Count |
|---|---|---|
| 1 | Dark brown: 6 sc in a magic ring. | 6 |
| 2 | Inc in every stitch. | 12 |
| 3 | [sc, inc] × 6. | 18 |
| 4 | Switch to light brown: [puff, sc, inc] × 6. | 24 |
| 5 | [2 sc, puff, inc] × 6. | 30 |
| 6 | [sc, puff, sc, inc, puff] × 6. | 36 |
| 7 | Sc around. | 36 |
| 8 | Change to yellow: for each of the 36 petals, slip stitch, then ch 5. Beginning in the second chain from your hook, work sc, hdc, dc, hdc; slip stitch into the next base stitch. Repeat around. | 36 petal repeats |
Cut the yellow yarn and set this front piece aside. Each short chain becomes a pointed petal; keep the stitches loose enough for the petals to fall naturally.
Add the plain back of the sunflower
Work with light-brown yarn:
| Round | Instructions | Count |
|---|---|---|
| 1 | Magic ring with 6 sc. | 6 |
| 2 | Increase × 6. | 12 |
| 3 | [sc, inc] × 6. | 18 |
| 4 | [2 sc, inc] × 6. | 24 |
| 5 | [3 sc, inc] × 6. | 30 |
| 6 | [4 sc, inc] × 6. | 36 |
Fasten off with a long yarn tail. Place the back against the front, sew along the outer edge, and add a little stuffing before closing. Keep the yellow petals free as you stitch.
Part 2 — Two rounded leaves
✿ Leaves and small details
Using light green, chain 7 for each leaf. Start in the second chain and work sl st, sc, hdc, dc, hdc, sc. Continue along the opposite side of the chain with sc, hdc, dc, hdc, sc, sl st; join with a slip stitch (12 stitches including the slip stitches, as counted in the source). Make a second leaf, leaving long ends to sew both onto the pen-cover stem.
The shared pen base: stem, pot and soil
All four designs in this collection use the same basic construction. Make the flower head described above, then complete the following three components. The stem is a sleeve that fits over a real pen; the soil has a narrow central passage to hold that sleeve.
1. Green pen-cover stem
✿ Pen sleeve: three important stages
The green sleeve can be shortened or lengthened to fit your pen.
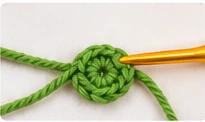
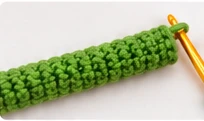
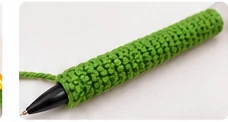
Use light-green yarn and a stitch marker. For a pen around 8 mm in diameter, work:
| Round | Work | Count |
|---|---|---|
| 1 | 6 sc in a magic ring. | 6 |
| 2–24 | Sc in each stitch (23 more rounds). | 6 each |
Fasten off and leave a yarn tail for assembly. Try the cover over your pen before finishing. If it is too tight, increase the stitches in the initial ring and maintain the new stitch count; if it is too short or tall, change the number of plain rounds. The length varies with the pen you use.
2. The little terracotta-colored pot
✿ Pot: R1 through R9
These are newly generated visual examples of the pot developing. Use the stitch table for exact stitch totals.
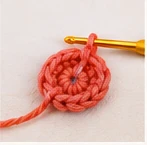
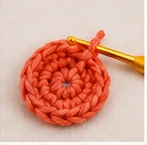
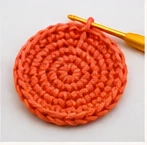
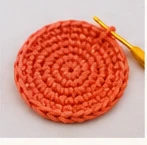
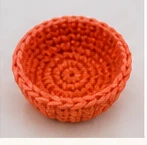
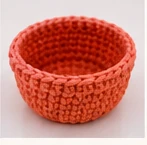
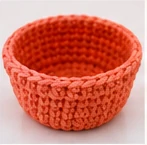
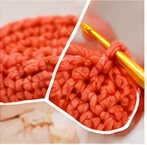
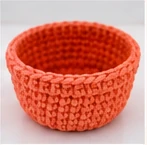
Crochet with orange or coral yarn in continuous rounds; the rim turns back toward the inside.
| Round(s) | Instructions | Stitches |
|---|---|---|
| 1 | Magic ring; crochet 6 sc. | 6 |
| 2 | Increase in every stitch. | 12 |
| 3 | [1 sc, inc] × 6. | 18 |
| 4 | [2 sc, inc] × 6. | 24 |
| 5 | [3 sc, inc] × 6. | 30 |
| 6 | [4 sc, inc] × 6. | 36 |
| 7 | [5 sc, inc] × 6. | 42 |
| 8 | Working in back loops only, sc around. | 42 |
| 9 | Sc around. | 42 |
| 10 | [6 sc, inc] × 6. | 48 |
| 11–12 | Sc around for two rounds. | 48 each |
| 13 | [7 sc, inc] × 6. | 54 |
| 14–15 | Sc around for two rounds. | 54 each |
| 16 | [8 sc, inc] × 6. | 60 |
| 17–18 | Sc around for two rounds. | 60 each |
| 19 | In front loops only, [sc, inc] × 30. | 90 |
| 20 | In back loops only, sc around. | 90 |
| 21 | Sc around. | 90 |
| 22 | In back loops only, [sc, dec] × 30. | 60 |
| 23 | In back loops only, sc around. | 60 |
Fasten off, turn the pot inside out, then stitch the edge of round 23 to the unused back loops of round 19. That forms the rolled rim shown in the construction. For a friendly face, add black eyes and a small smile with embroidery thread (optional). You can also use safety eyes for an adult desk decoration, but avoid detachable parts around young children.
3. Crochet the removable-looking soil form
✿ Soil shape and hollow center
The central tunnel remains open for the pen sleeve; schematic, not a photograph.
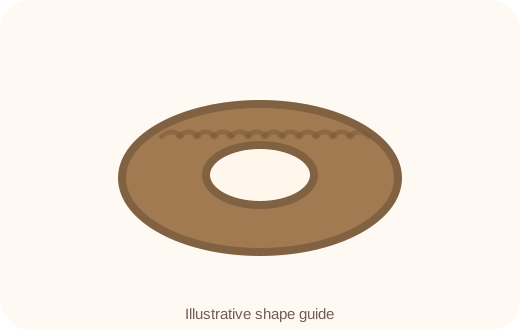
Work in light brown. The narrow center is deliberate—it makes space for the pen stem.
| Round(s) | Instructions | Stitches |
|---|---|---|
| 1 | Magic ring with 6 sc. | 6 |
| 2 | Inc in every stitch. | 12 |
| 3 | [sc, inc] × 6. | 18 |
| 4 | [2 sc, inc] × 6. | 24 |
| 5 | [3 sc, inc] × 6. | 30 |
| 6 | [4 sc, inc] × 6. | 36 |
| 7 | Working in back loops only, sc around. | 36 |
| 8 | Sc around. | 36 |
| 9 | [5 sc, inc] × 6. | 42 |
| 10–11 | Sc around. | 42 each |
| 12 | [6 sc, inc] × 6. | 48 |
| 13–14 | Sc around. | 48 each |
| 15 | [7 sc, inc] × 6. | 54 |
| 16–17 | Sc around. | 54 each |
| 18 | [7 sc, dec] × 6. | 48 |
| 19 | [6 sc, dec] × 6. | 42 |
| 20 | [5 sc, dec] × 6. | 36 |
| 21 | [4 sc, dec] × 6. | 30 |
| 22 | [3 sc, dec] × 6. | 24 |
| 23 | [2 sc, dec] × 6. | 18 |
| 24 | Add a little stuffing without filling the center, then [sc, dec] × 6. | 12 |
| 25 | In back loops only, sc around. | 12 |
| 26–35 | Sc around for ten rounds to make the hollow tube. | 12 each |
| 36 | In back loops only, dec × 6. | 6 |
Fasten off, then carefully push the narrow tube inward through the lightly stuffed soil shape, using the blunt end of a pen or marker if needed. This creates the central opening pictured in the source pattern. Keep the center open rather than filling it with stuffing.
Put the flower pen together
✿ Completed project reference
- Sew the finished blossom securely to the top of the green pen sleeve. Position it so the bloom faces forward.
- Add the two leaves to opposite sides of the sleeve, where your flower instructions indicate.
- Set the crocheted soil piece into the pot and secure it with small, tidy stitches around the edge so it stays in place.
- Guide the green pen cover through the central opening of the soil. Check that the pen tip remains usable and that the flower head is balanced.
- Weave in loose yarn ends and gently shape the petals with your fingers—no heavy pulling.
Fit and safety: This is a decorative pen accessory, not a toy for small children. Test the diameter and length against the actual pen, avoid blocking the writing tip, and secure small parts carefully.
A few questions before you finish
Can I use another pen? Yes. The source gives the tube for a roughly 8 mm pen. A wider pen needs more starting stitches and the corresponding number of sc in subsequent rounds; make a quick fit check first.
Why does the soil have a hole? The inward-folded tube creates an opening for the pen-cover stem; stuffing the center solid would prevent that.
Can I change the pot color? Absolutely. Coral, terracotta, blush pink, and moss green all suit this little desk-garden collection.
Ready for another flower? Browse the full free pattern library to mix more blooms in a handmade bouquet.