Little Octopus Scent Keeper — Crochet Amigurumi
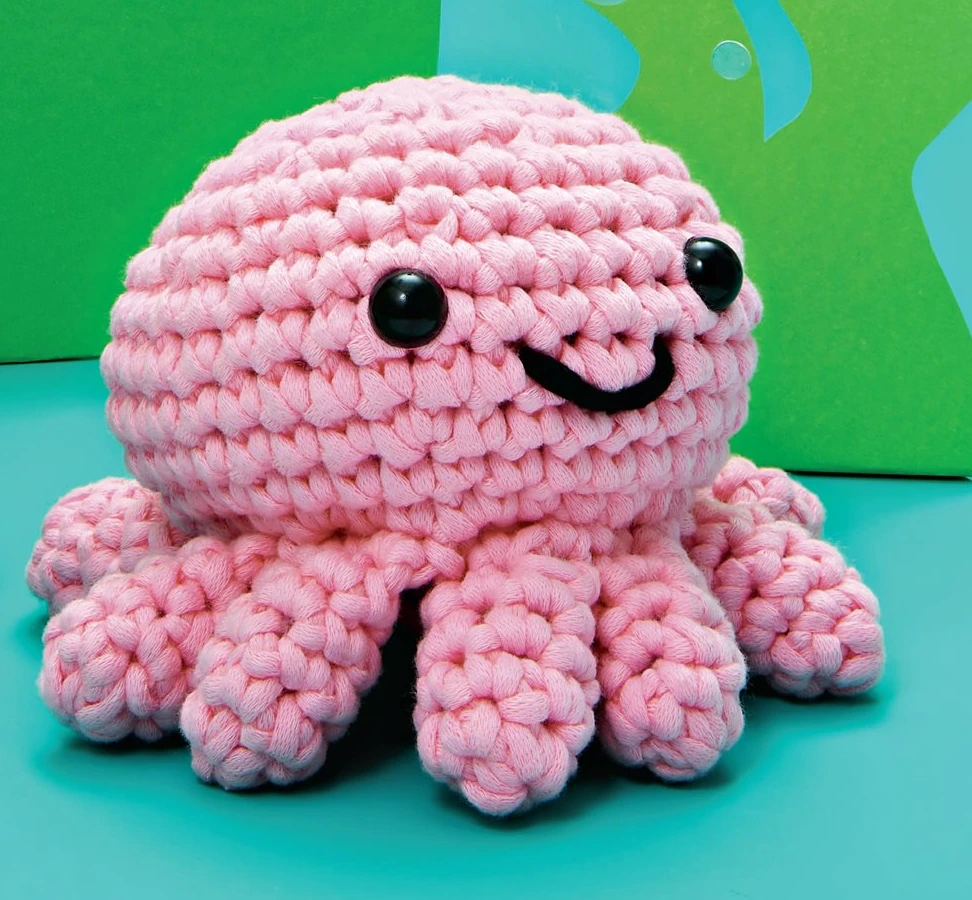
Crochet a cheerful pink octopus with eight tiny arms and a hidden potpourri pouch: a cute, functional handmade shelf companion.
Project details & close-ups
Each pattern has its own set of useful visual references
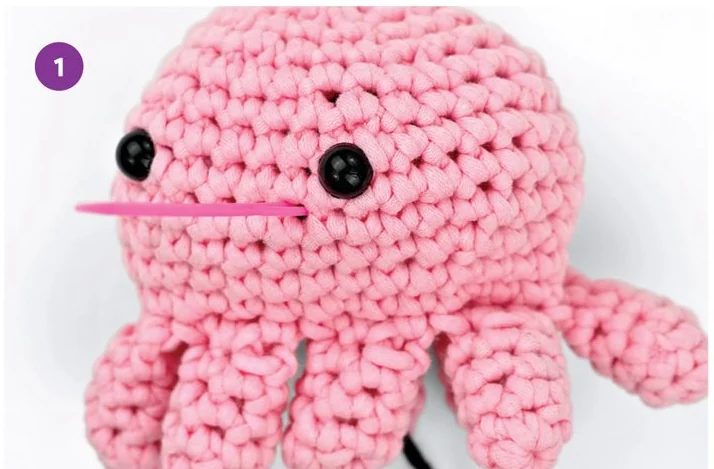
✳ Gather your supplies
- Medium-weight (#4) pink yarn, about 50 yd / 46 m
- A small amount of black yarn for the smile, about 1 yd / 1 m
- 4 mm (US G/6) crochet hook
- Pair of 10 mm safety eyes (or embroidery yarn for stitched eyes)
- Small secure bag of potpourri, stitch marker, tapestry needle, scissors
Some handmade projects simply make a shelf feel happier. This rosy octopus has a friendly face, eight short arms, and an unexpected job: hiding a small sachet of fragrant potpourri inside its hollow body.
Before your first stitch
- Finished size: approximately 3½ in / 8.9 cm high and 4 in / 10.2 cm wide.
- Shape: eight small arms are crocheted together to create the bottom edge; the round body is made upside down, narrowing toward the top of the head.
- Important: don’t pack the body with regular toy stuffing. Leave room for the potpourri sachet, which goes in through the bottom opening.
- Terminology: US crochet stitch names; use a stitch marker at the start of each continuous round.
Crochet shorthand
| Abbreviation | Meaning |
|---|---|
| ch | Chain |
| sc | Single crochet |
| inc | Work 2 sc into the same stitch |
| dec | Single-crochet decrease |
| sl st | Slip stitch |
| [ … ] × n | Repeat the bracketed steps n times |
The stitch count at the end of a round is shown in parentheses.
Part 1 — Make all eight octopus arms
✿ Arms and joining
With pink yarn, crochet eight identical pieces. These are small, softly rounded tubes that will form the skirt of tentacles.
| Round | What to do | Count |
|---|---|---|
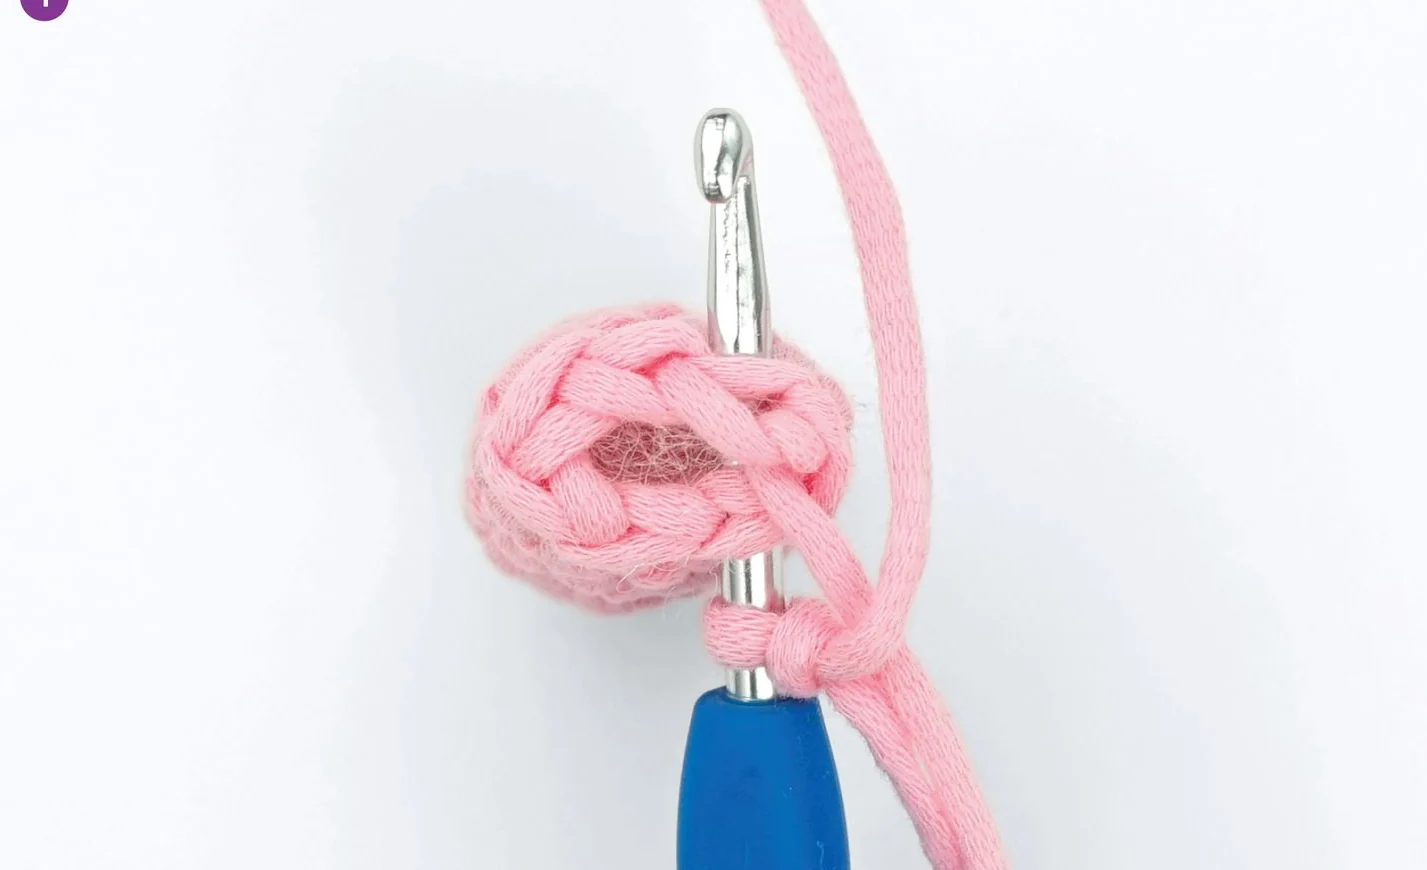
| 1 | Make 6 single crochets in a magic ring. | 6 |
| 2–5 | Work 1 sc in each stitch for four rounds. | 6 each |
Add only a little stuffing to each arm. Flatten the opening so the six stitches become three opposing pairs. Fasten off invisibly, saving the yarn tail for tidying up later.
Keep the arms together: Lay all eight in a circle before joining. A quick arrangement check helps prevent a twisted or uneven octopus base.
Part 2 — Join the arms into the body
This construction is the clever part: instead of sewing on the arms after completing the body, you join them as you crochet your opening round. Each flattened arm contributes three stitches to the new body: eight arms × three stitches = 24 stitches.
Round 1 — Crochet across the flattened arms (24)
- Take the first flattened arm and slip-stitch through the first pair of opposite stitches to join your working yarn.
- Make a single crochet through that same paired spot, then work a single crochet through each of the arm’s two remaining paired positions.
- Continue into the next arm, again crocheting through its three paired positions.
- Work all the way around all eight arms, joining each arm to the growing body. Your starting edge should measure 24 single crochets.
Crochet over any short yarn tails as you work if they can be safely tucked in; otherwise secure them on the inside. Maintain an opening beneath the arms for the drawstring closure.
Rounds 2–13 — Build the upside-down head
Continue in pink yarn, working in continuous rounds.
| Round | Instructions | Count |
|---|---|---|
| 2 | Repeat [2 sc, inc] eight times. | 32 |
| 3 | Sc all the way around. | 32 |
| 4 | Repeat [inc, 7 sc] four times. | 36 |
| 5–7 | Sc around for three rounds. | 36 each |
| 8 | Repeat [dec, 4 sc] six times. | 30 |
| 9 | Sc around. | 30 |
| 10 | Repeat [3 sc, dec] six times. | 24 |
| 11 | Repeat [dec, 2 sc] six times. | 18 |
| 12 | Repeat [sc, dec] six times. | 12 |
| 13 | Work six decreases. | 6 |
Add the face as you work: Install the eyes between rounds 6 and 7, with seven stitches between them. Because you’re making this octopus upside-down, those same eyes appear between rounds 8 and 9 if counting from the finished top.
At the end of round 13, leave a long yarn tail. Draw it through the front loops of the remaining six stitches, pull the opening closed, and tuck the tail in securely.
For babies or pets: Use embroidered eyes rather than hard plastic safety eyes. Potpourri and sachets are not safe toy fillings; this version is meant for decorative adult use.
Part 3 — Stitch a curved, happy smile
✿ The little octopus face
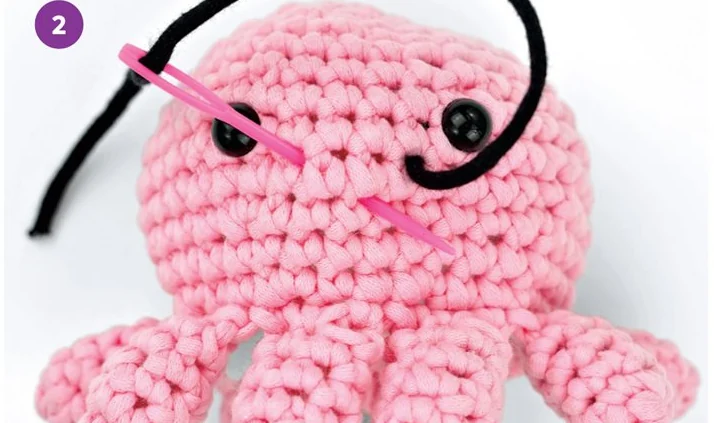
The head stays hollow, which makes this a good time to embroider from the inside.
- Thread your tapestry needle with black yarn. From inside the octopus, bring the needle out at the spot chosen for one corner of the smile.
- Travel across the outside and insert the needle three stitches to the left to form a gently curved line. Bring the needle back out one round below, centered between the two smile corners.
- Use that lower stitch to catch the curved yarn lightly, pulling just enough to give it a smiling shape. Return the needle through the same lower opening.
- Tie the yarn ends neatly inside the octopus and trim them short.
Aim for a small smile rather than a taut straight line; the tiny dip at its center adds expression.
Part 4 — Make the hidden drawstring pouch
✿ Hidden pouch
The bottom remains open between the arms so you can add a little potpourri bag. Here’s how to close it without stitching the sachet permanently inside.
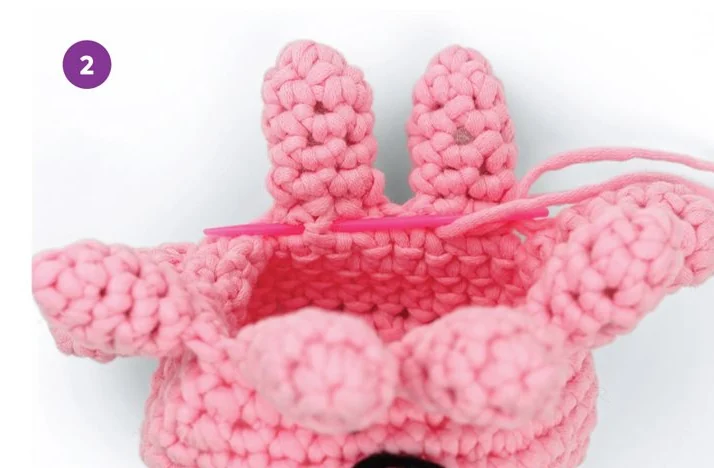
- Cut a comfortable length of pink yarn and thread your needle. Starting from the inner side of the base, pass the needle around one stitch at the center of an arm, exactly where that arm joins the body. Leave a tail of about 6 in / 15 cm.
- Continue to the center of the next arm, moving counterclockwise around the octopus. Pass the needle around one joining stitch on each of the eight arms, forming a loose drawstring circle.
- Place a securely closed bag of potpourri into the hollow head. Trim the two ends of the drawstring to equal lengths, draw them together until the base closes, then tie a neat bow.
- Hide the bow and loose ends inside the body. To refresh the scent, carefully loosen the drawstring and replace the sachet.
Style and care notes
This little octopus looks especially pretty perched on a dresser or inside a wardrobe where its fragrance can gently circulate. Keep it away from moisture, open flames, children and pets; avoid using loose potpourri that could escape through the stitches.
For a different mood, make your octopus in sea-glass blue, lavender or warm apricot. Changing the color is an easy way to make a gift feel personal without changing the stitch counts.
One more handmade idea
Want another cute project for gifting? Crochet our Koala Bottle Buddy + Eucalyptus Glass Charms next.